Optimizing an Animation with Transparent & Semi Transparent background

This Tutorial is my own creation and belongs to me ©Kathy Butler.
Any resemblance to other Tutorials on line is purely a coincidence.
Do not upload to any website, share, re-write, script or translate
any part of this tutorial and/or tutorial supplies without permission from me.
Tutorial supplies and any other parts from my tutorials that are made by me
belong to me and may not be sold.
Please feel free to link to this tutorial.
Please note, below are the steps I usually follow for creating my animations with transparent backgrounds. I say “usually” because each animation is unique.
It is sometimes necessary to adjust the settings to suit the image and reduce file size.
These are only the steps I use. Others may have different and/or better ways of optimizing an animation.
I have included 4 .MNG files. One beetle with a drop shadow and one beetle without a drop shadow plus the 2 backgrounds for you to follow and/or experiment with the tutorial….here
Step 1
Open the supplied beetleboogie.MNG file in Animation Shop.
If your frames are prepared and ready for optimization, now is a good time crop the excess canvas away. The supplied file has already been cropped so you can skip to step 2 and give the animation your own unique name.
Crop tool; options; Surround the opaque area; ok; crop
a. 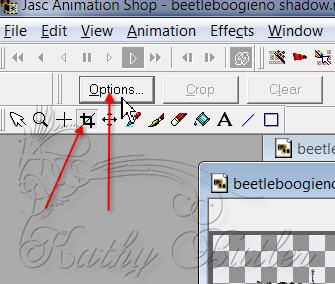
b.
c. 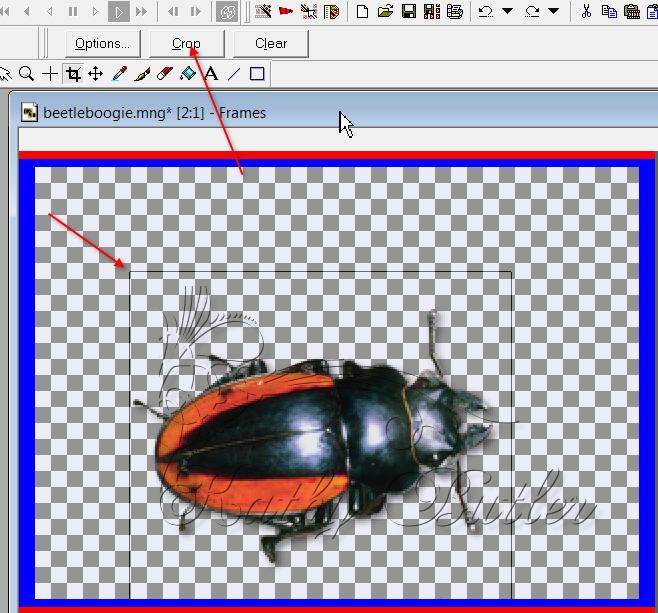
d. 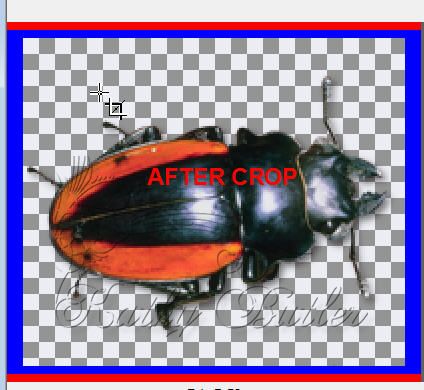
Step 2
Save your frames as a .MNG file.
File; save as; give the file a name and choose “.MNG” from the drop down menu. Click save.

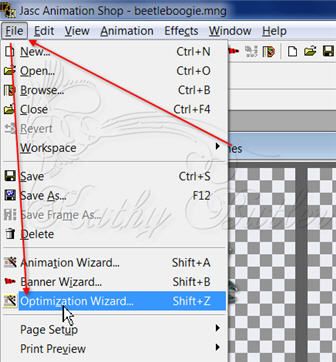
Step 3
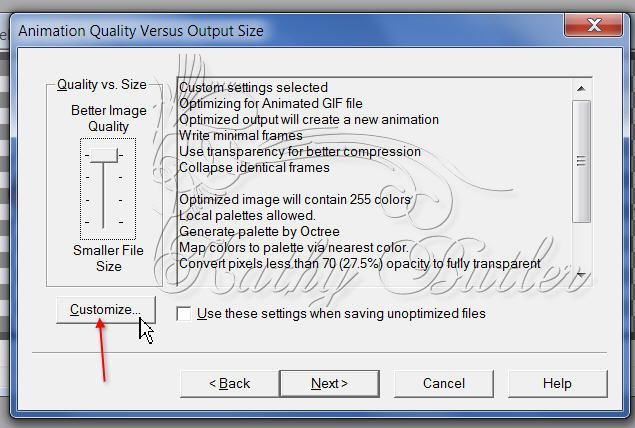
File> Optimization wizard (Shift + Z)
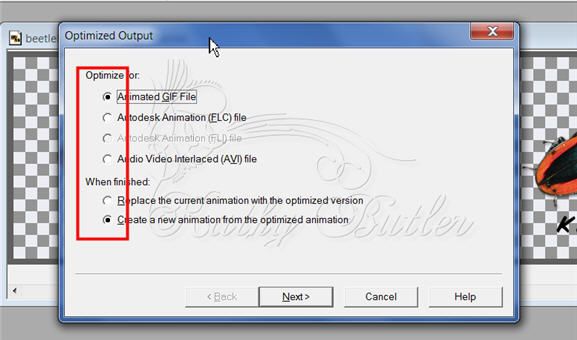
Step 4
I always check Create a new animation. That way my original mng file is always available.
Step 5
Most images look best at the highest setting. However, it is a good idea to play around with the slider settings to test out the result. Very often, you can get a great result with a small overall file size. The lower the slider, the fewer the colors used in the final result.
Click on Customize.
Step 6
The settings below, under the “Colors” tab, are the ones I use most often. On occasion, I will use Optimized Median Cut if I am not happy with the results using Optimized Octree.
Reducing the number of colors also reduces the file size. The downside is that it can also reduce the quality of the resulting animation. Experiment with different setting until you get one that works best for you. Keep in mind, the settings will most likely be different for your next animation project.
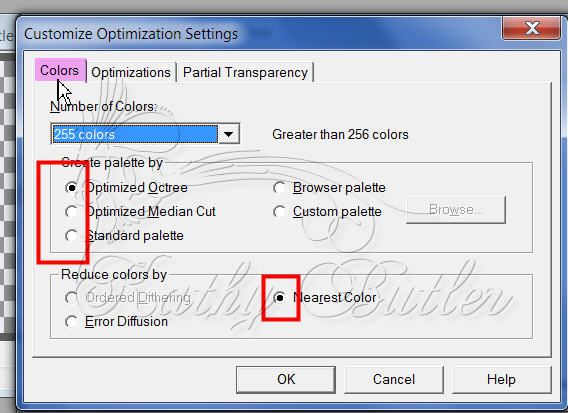
Click on the Optimizations tab.
Step 7
These are the settings I use under the Optimizations tab.
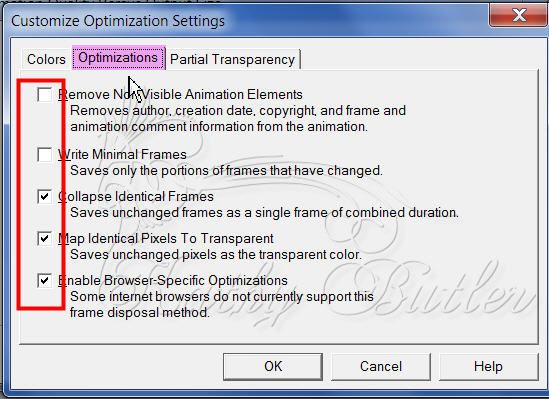
Click on the Partial Transparency tab.
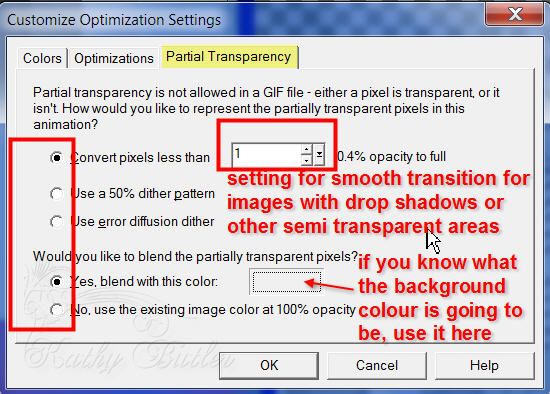
Step 8
It is under the Partial Transparency tab that you will be doing the most adjusting to get the desired results. The settings below are the ones I generally use for animations that have no to very little transparent areas.
In the area: Yes, blend with this color
A lighter, but not white, blending color will help to make my animation look it’s best on most medium to light backgrounds. I generally use a light to medium grey colour. If I know I am going to use darker backgrounds, I will adjust the blending colour to a much darker shade of grey and adjust as needed.
In the area: Convert pixels less than
The higher the number in this area, the more pixels are removed around the edges. This setting works well for most transparent images. If the number is too high, too many pixels are removed and the edges are jaggy. Unless the image is truly opaque, if the number is too low, too much of the “blending” color shows in the final result and will not look good on some backgrounds.
These settings are image dependent and work best on images with very little, if any, transparent pixels on the edges. With this setting, most of a drop shadow, if present, will be removed but the result may not be pleasing.
It will require patience and maybe many adjustments and re-optimizing until you are happy with your results.
Remember to always undo the previous optimization on your original .MNG file before optimizing again.
Here are the settings:
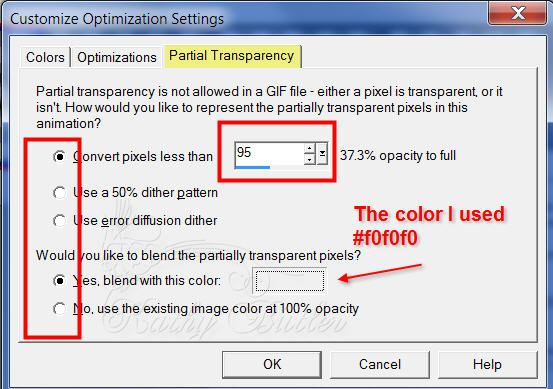
In a later step, I will show the settings I use for frames that have some transparent areas such as drop shadows etc.
Click OK then Next to continue.
Step 9
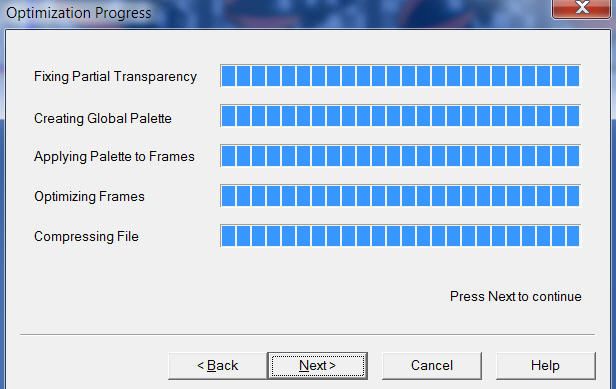
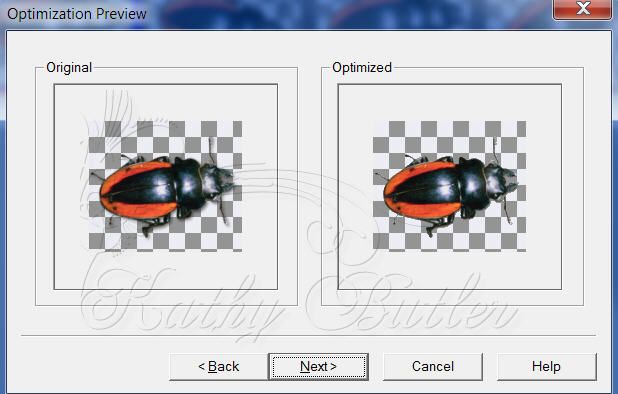
Step 10
If you like what you see, click next to continue. Otherwise click back to make adjustments in your settings.
Step 11
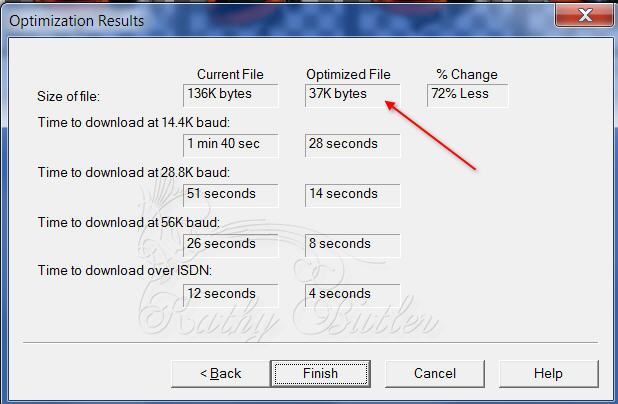
Here you can see your new animation file size. If it is too large, you can click on Back to make some adjustments in the type and amount of colors etc.
Step 12
If you like your result, then go ahead and save the new animation to your computer as a GIF file.
File; save as; choose GIF type from the drop down box. Give the file a name and click on save.
Otherwise, delete the new GIF animation and start again using the original .MNG file.
Remember to undo the last optimization that was done on the original .MNG file before starting over or saving it.
Step 12B
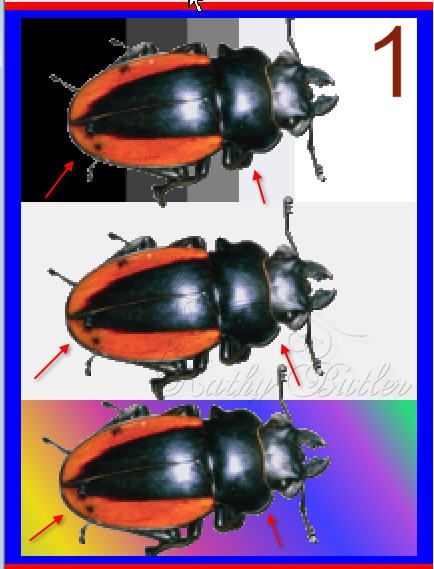
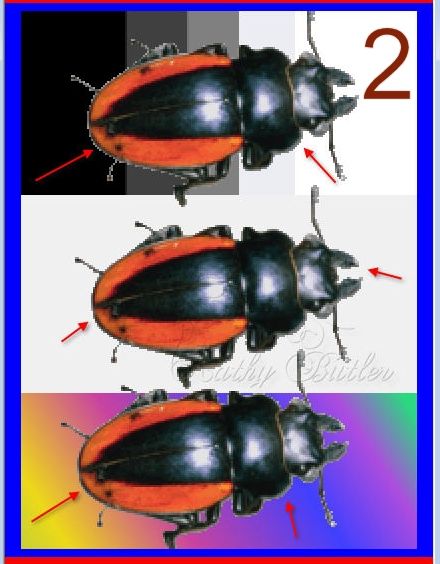
Samples of results on different backgrounds.
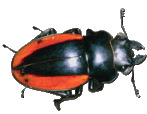
Image 1 - Results using an image with no/very little transparent areas.
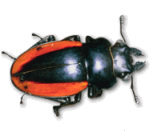
Image 2 - results using the same settings on an image that had a very slight 2 pixel drop shadow. The resulting edges are not quite as smooth.
Using the lighter grey blending color, the images show well on medium to light color backgrounds. The blending color shows a bit on the darker colors. This gives more flexibility for displaying your hard work.
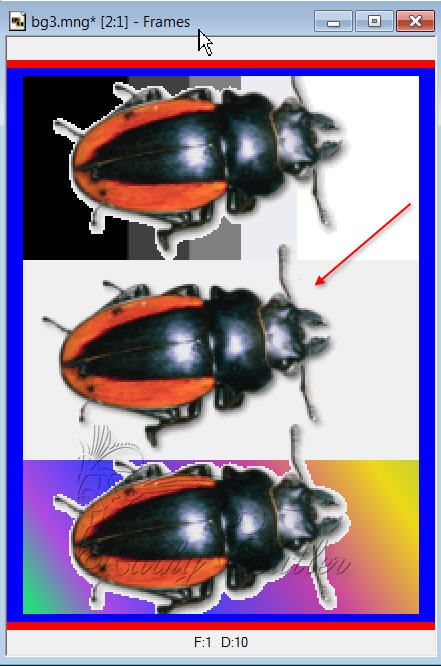
Below are the settings I use, under the Partial Transparency tab, for images with drop shadows and/or other transparent pixels. This is just one way, of many, to optimize this type of image. I like the background as transparent as possible to keep my options open.
In an optimized animated GIF, transparent pixels will be filled with pixels from other colors. I like to choose which colors that will be. The ideal is to choose a color that will blend best with the background. I almost always use a blending color that is the same as the background color the animation will be displayed on.
In the area: “Convert pixels less than”,
the higher the number the more pixels are removed, the opposite is also true. The lower the number, the more “blending color” pixels will be added resulting in a much smoother blend.
For this lesson, I have set this area to 1. This setting will allow a very smooth blend for any semi transparent areas with the target background color.
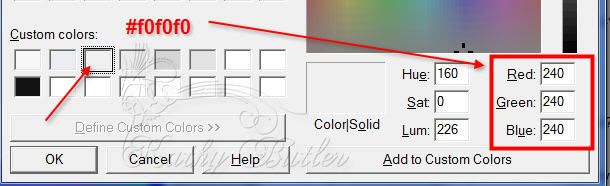
In the area: Yes, blend with color:
For this sample, I used the same color as before #f0f0f0 because that is the background color I displayed it on below. This area should almost always be the same color as the background the animation is going to be displayed on.
If you know the target background color, use it now in this area. If you do not know the target background color, this type of animation will show the chosen blending color on most target backgrounds that are a different color from the blending color. For an alternative, see Step 14.
Click OK and follow Steps 9 – 12 to finish.
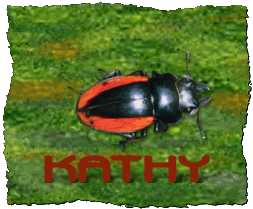
Sample of animation result showing how well the animation blends with the background of the same blending color.
Step 14
Transparent Background Animation when Target Background color is unknown.
Example: Place the animation on any color background that is complimentary to the image. Be creative. The edges can be fancy or not. Just make sure the background you choose does not have any semi transparent edges and yet does not cover the entire canvas.
To do this:
First:
Create your background in PSP. Copy and paste one of the frames from the animation on a layer above your new background layer. Use the animation frame for guidance.
Once you are happy with the result, hide the top animation frame image.
Edit; copy merged and paste into Animation Shop as a new animation.
Second:
In Animation Shop with the new background image active:
a. Ctrl +L to make as many frames as in your animation. Mine was 6 frames.
b. Make the original .MNG animation active.
c. Edit; select all; copy
d. Activate the new Background frames file.
e. Edit; select all; right click on Frame 1 (make sure it is frame 1 and that all frames remain selected). Paste: into selected frame (Ctrl+E)
f. Choose where you want it to go and left click with your mouse to place it
g. Your image should now be on all of your background frames.
Now that all of your semi transparent areas on on a solid background, follow Steps 2 through 12 to complete your animation.
Here is a sample of an animation placed on a background with transparency around the edges:

Here is a link to Optimizing an Animation with solid background
http://schoolforpsptutorials.yuku.com/topic/570
Enjoy!!
I have deleted and started over on many different animations just to get the look I want.
I hope the above tutorial is of some use to you.
Kathy butler
MAY 2013
