NAME IN RAGS

This Tutorial is my own creation and belongs to me ©Kathy Butler.
Any resemblance to other Tutorials on line is purely a coincidence.
Do not upload to any website, share, re-write, script or translate
any part of this tutorial and/or tutorial supplies without permission from me.
Tutorial supplies and any other parts from my tutorials that are made by me
belong to me and may not be sold.
Please feel free to link to this tutorial.
SUPPLIES NEEDED:
PSP any version should work.
Font of choice.
I am using a Font called Patchwork Letter that you can get here
Assortment of patterns for filling the letters.
Tube of choice.
I am using the PTU Raggedy Kids artwork of Laurie Furnell formerly of PC Crafters
License to use Laurie's work can be purchased here
Please do not use the same image without a license.
NOTES:
I did this tutorial using PSP X4 but it can easily be done in any version.
This tutorial is at a beginner to intermediate level but assumes you have
some knowledge of using PSP and filters.
I used different papers that came with my tube plus bits and pieces of the Raggedy Kids images to fill my name.
Most important SAVE your work often. I will be reminding you to do
so as you go along :)
Lets get started:
STEP 1
File, New, 650 X 650, transparent checked (I like lots of room to work :), you can resize smaller later if desired)
Flood fill tool, flood fill with white #ffffff if you wish to make it easier to see what you are working on.
Text tool: these are the settings I used -
Patchwork Letter; size 150; Anti-alias smooth, foreground transparent, Background Black #000000; create as: Vector
May have to play around with the size depending on your resolution.

Click on your canvas and type each letter of your name on a separate vector layer.
Name each layer with the matching letter.
Keep layers as vectors for now.
SAVE.......
STEP 2
Tools> move tool (move tool makes it easier to see as it does not use bounding box)
Go to each layer one at a time and arrange (move) your letters to spell out your name (or whatever you are using).
Tools> Deform tool (pick tool)
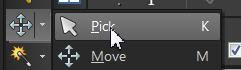
Go back to each layer again and using the deform tool, twist, reshape, resize and/or rotate your letters to your liking.
Once you are happy with your name layout, go to step 3
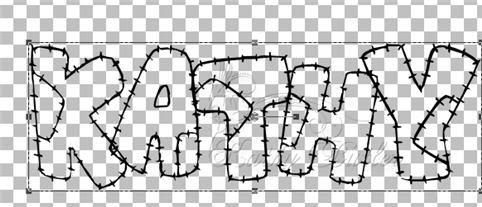
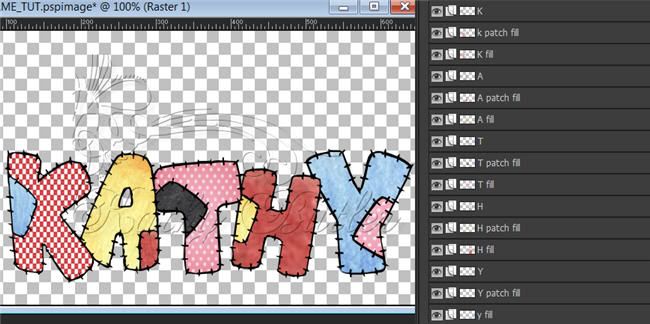
This is what my letters look like at this stage. Each letter remains on separate layer.
SAVE.....
STEP 3
Tools> magic wand
Set your magic wand to:
Mode: replace, Match Mode: RGB value; Tolerance 10; contiguous checked; feather 1; anti-alias checked.
Highlight one of your letter layers (mine is K)
Layer> convert to raster
With your magic wand, click inside the main part of the letter - not the patch part.
Selections>modify>expand by 2 - keep selected
STEP 4
Layers, new raster layer.
Layers> arrange> move (not merge) down. Move the new raster layer below the letter outline layer you are working on.
Layers> rename to whatever letter it is + fill (mine is K fill)
Using Flood fill tool, flood fill with a colour or pattern of your choice. Be sure to change the size of your pattern, if needed, to suite your image.
Alternatively, copy a pattern you like and then activate your letter layer you are working on
Selections>paste into selection
Deselect
For my first letter, I opened the "red check" paper that came with my Raggedy Kids tube in a new file and copied then pasted it into the active selection in my working file.
.
STEP 5
Highlight the same letter outline layer again (in my case it is still the "K")
Magic wand, same settings as before, click inside the patch portion of the letter.
Selections>modify>expand by 2
Layers>new raster layer
Layers> arrange> move down 1x. Move the new layer below the letter outline layer but above the Fill layer.
Layer> rename .... name this layer (whatever letter) + Patch fill ( mine is K patch fill)
Flood fill or copy and paste with colour or pattern of your choice. I copied and pasted into selection a portion of the Raggedy Boy's pant leg
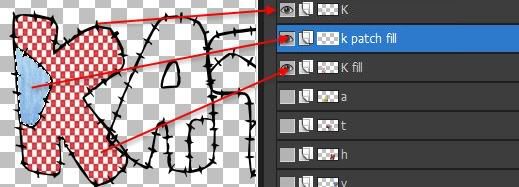
This is what my layers and first letter look like to this point
SAVE.....
STEP 6
Follow steps 3 through 5 for each of your remaining letter layers. Renaming each layer accordingly.
This is what my name layers look like after Step 6
Now is the time to play around with the layer modes, textures etc to get the look you want.
I duplicated some of the layers and changed the top layer to "multiply" then merged down the top layer to keep each letter with only 3 layers (outline, patch fill, fill).
SAVE.....
STEP 7
Highlight one of your letter outline layers ( K for me)
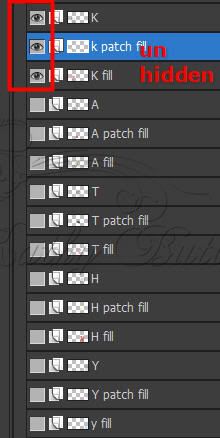
Layers> View>current only
Un hide Fill layer (K fill) (click on the little box area to left of the layer you are on to show the eye) 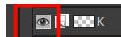
Un hide Patch fill layer (K patch fill for me)
There should only be the 3 layers of one complete letter visible. All the other layers should be hidden.
Highlight Letter's fill layer (K Fill for me)
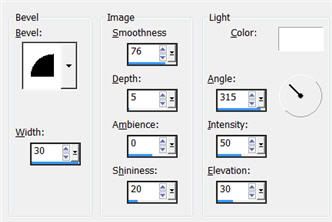
Effects>3D effects>inner bevel set to your liking or use my settings
Bevel 2; Width 30; Smooth 76; Depth 5; Amb 0; Shine 20; angle 315; intensity 50; elevation 30
STEP 8
Highlight current letter patch fill layer (K patch fill for me)
apply the same Inner bevel as in step # 7
Make sure only the 3 layers for your current letter are the only layers open (visible)

If you are happy with what you see ...
Layers>merge>merge visible
Right click on layer palette and rename layer to the matching letter (K for me)
Click on the little eye to left of layer to hide your first completed letter layer.
SAVE.....
STEP 9
Highlight your next letter outline layer
Unhide the current layer and the 2 fill layers that go with it (fill and patch fill)
Highlight the "fill" layer for the current letter
Apply the same inner bevel as in the first letter
Highlight the "patch fill" layer for the current letter
apply the same inner bevel
Make sure the 3 layers of the current letter you are working on are the only layers visible
If you are happy with what you see
Layers>merge>merge visible
Right click on layer palette and rename this layer to the letter it represents
Click on the little eye to left of the current layer to hide your second completed letter layer
STEP10
Follow Step 9 for each of the remaining letter layers for your name.
SAVE.....
STEP 11
Unhide (make visible) each of the completed letter layers for your name
There should be one layer now for each letter.
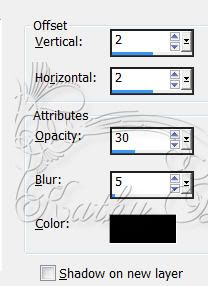
Highlight each layer one at a time and apply a drop shadow.
These are the settings I used.
H & V 2; Opacity 30; Blur 5
Colour black #000000
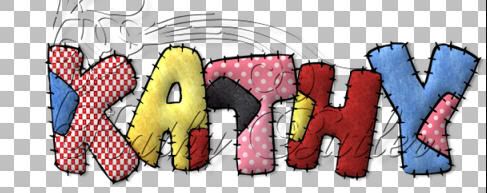
This is what I have now with letters still on separate layers.
SAVE.....
STEP 12
If you are using the same tubes as me, I used the Raggedy girl, boy, sun and dog from the kit.
They were quite large so I had to resize them quite small
Otherwise, see ALTERNATIVE steps below.
Highlight top layer
Copy and paste the tubes you are going to use as new layers.
I moved the boy and the sun layers to the bottom of all the layers.
Either highlight and drag the layer to where you want it in the layer palette or go to
Layers> arrange> send to bottom.
Layers> arrange> move up 1x (to move it above the background layer if you are using it.)
The girl and dog are placed at the top of all the layers.
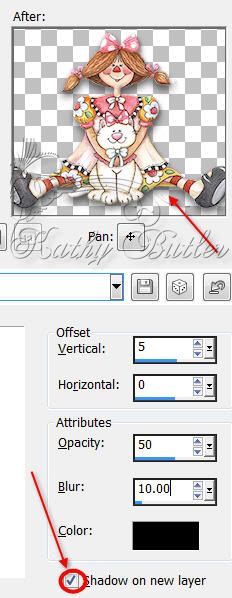
The girl is sitting on the letters so I added an additional drop shadow below her to cast on top of the letters she is sitting on.
Be sure to put a check mark in the "Shadow on new layer " box
I used these settings
H 5; V 0; Opacity 50; Blur 10, colour black #000000
check mark in Shadow on new layer
SAVE.....
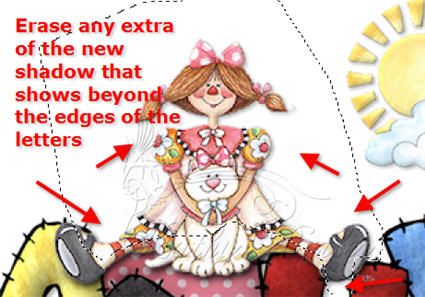
Highlight the "girls shadow layer" and erase any of the extra shadow that goes beyond the letter edges.
ALTERNATIVELY:
Highlight the top layer.
Copy and paste your tube(s) as new layers.
Resize your tubes as necessary.
Arrange your tubes and/or elements to your liking.
Drop shadow all your tubes using the same drop shadow settings
I used:
H & V 2; Opacity 30; Blur 5
Colour black #000000
SAVE.....
We need to get rid of the extra canvas area.
Make sure the background layer is hidden
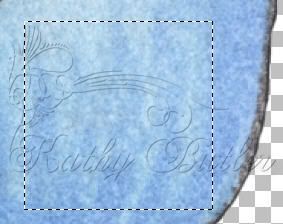
Selection tool> rectangle
Click on the Merged Opaque icon on top tool bar(see screenshot)

A selection marquee surrounds your entire visible image.
Image> crop to selection
SAVE....
I always duplicate at this point to save a copy with all the layers in place.
Window> duplicate (Shift + D)
Close original working image
Layers> merge> merge visible
Layers, new raster layer
Add your watermark and the appropriate copyright credits
Save your work as a jpeg or png (for transparent background) for using as you like.
That's it... you're done :)
I Hope you enjoyed working on this tutorial
I would love to read your comments and see your results...
http://kateysplace.weebly.com/
April 22, 2012
